

How to Glue Chip Glass instructions By Ron Percell
I hope this is the beginning of a Enriching Journey into field that many hold atop the pinnacle of Reverse glass decoration. We hope to simplify these steps to help you gain the basic knowledge behind Glue Chipping Glass for hobby or business.
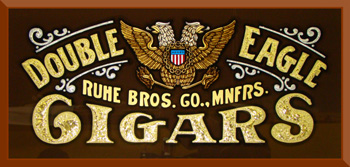
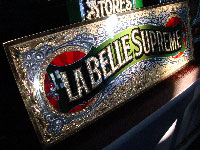
Glue Chipped Double Eagle Cigars by Ron Percell, Rawson and Evans Reproduction
Mixing the Hide Glue:
Animal Hide Glue, Hide Glue or Hide Glue used for glue Chipping glass 164 Gram Strength is the best grade to chip glass signs or windows with. Use 3oz of hide glue per 1 square foot of glass to be chipped. A 1 lb Package or 16 ounces covers approximately 5 sq ft.

The mixing ratio of glue to water is 1 part glue to 1 ½ parts of water. The glue and water are combined together in your "Glue Pot" and allowed to soak for ½ hour before turning on and applying heat to your "Glue Pot". After soaking the glue apply heat and allow to heat for ½ hour.

You will use less water mixing 1 to 1, but the glue gels rapidly and can slow the flow of the glue which can cause uneven-level areas which can result in poor or uneven chipping. If brushing on, add red food coloring to your glue. Brushing on requires tree coats and the red food coloring assists in being able to see if you’ve covered your area without missing a spot, due to the fact that the color of the glue will intensify with each coat allowing you to see lighter areas that might of normally been missed.
We prepare the glue before prepping our glass so that the glue is ready to apply once our glass is ready. If for some reason your interrupted for a couple of hours, simply and your glue thickens in your glue pot you may add a little water and allow the heated to reconstitute the water, or you may shut off the glue pot and keep it stored away and safely from any Children and Animals, and to avoid any ingestion which could cause serious illness and or death. Hide Glue is made from dead animal hide and the chipping of the glass by the glue is caused from the "Hide Glue" drying and going through the rigamortise process, thus a tightening and shrinking occurs pulling on the glass and causing the chipped effect.
Preparing the Glass:
Glass of all types can be chipped, ¼” thick annealed plate glass is works best . If using thinner glass such as 1/8”, use Double strength, it’s fine for smaller projects. 1/16” window glass (single strength is to be avoided unless the project is under a square foot. When attempting to chip large areas on thin glass , you run the risk of the panel breaking during the hide glue’s drying/contracting phase. Hide glue chips usually 50% of the way through the glass on average, so a 1/16” piece after chipping may be only 1/32” thick, which could break easily upon touching by hand.
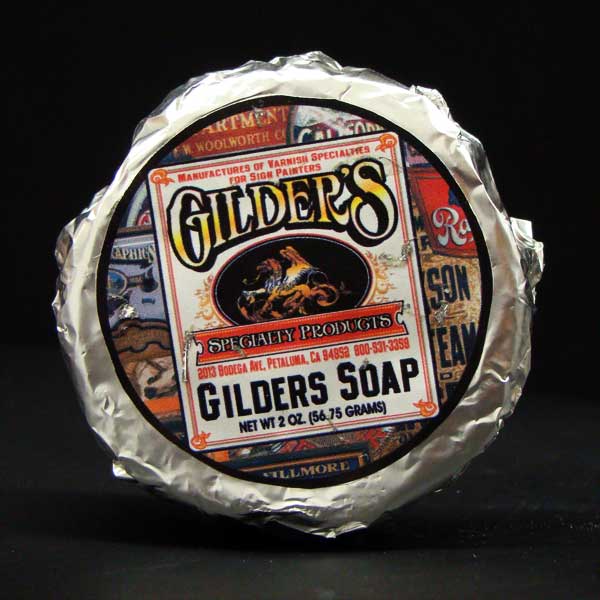
Clean and degrease the working side of your glass panel with "GIlders Soap".
Applying Asphaltum:
Dry your glass well, now you may apply (roller or brush) a thin even 1st coat of "Gilder's Asphaltum Varnish" to your working side of your glass and allow to dry, usually 10-20 minutes then apply a 2nd and final thin coat of asphaltum.
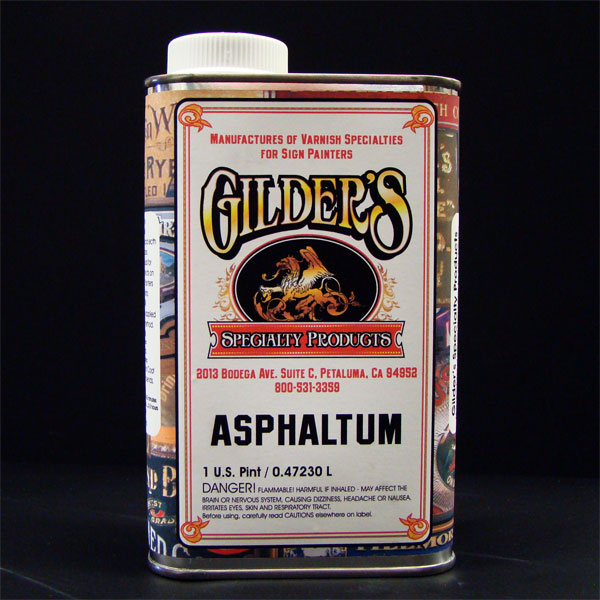
After the 2nd coat when the varnish film feels dry to the touch, the glass will be ready to apply your resist or vinyl to the surface for etching. Make sure to apply resist dry, don’t use water or application fluid.
To get the glue to chip the glass you will need to etch or give the surface some tooth via sand blasting using 100 grit Aluminum Oxide works well or 120 mesh sand in which Intermediate 4 mil vinyl is strong enough or you may use sand blast mask such as Anchor’s brand, seeing that we just need to frost the glass. Once the mask is applied well, you may pounce or transfer your design(mirrored/reversed) to the working side of your glass and either Knife cut the image or for those for those with plotters transfer the mask and weed out the resist in the areas desired for chipping glass.

Sandblasting:
A light frost is all that is required, as blasting the "Gilder's Asphaltum Varnish" will disintegrate leaving frosted glass, just enough to remove the asphaltum and the shine from the glass surface. Avoid large sandblasting services which descale metal or blast wood because their pressure is too high and the abrasive size too coarse. 100 to 120 grit Silica sand is adequate if no aluminum oxide or silicon carbide is available. Make sure all asphaltum is blasted off before removing mask, After blasting, remove/blow off any dust on the surface. Do not wipe it off and avoid touching surface with your fingers as it may leave oils behind or possibly cut yourself.
Glue Application and Leveling:
at this point, stir your "Animal Hide Glue" and make sure there's no lumps and it’s ready to apply. The hide glue is best when between 140 and 145 degrees for 5 minutes. This lines up the protein chain to deliver the glue full strength (referred to as prepared gelatin) and have the temperature hot enough to kill bacteria and not so hot to as to crack the glass. It is important the glue remains warm in order to flow and level properly.
Place the glass panel on a level work area and remove any remaining sandblast resist mask, try not to remove the "Gilder's Asphaltum Varnish". When the Asphaltum Varnish peels off to easily with the removal of the the mask, this can indicate that the glass wasn’t clean enough during its application. If this happens you may touch up any holidays or broken lines with a brush.
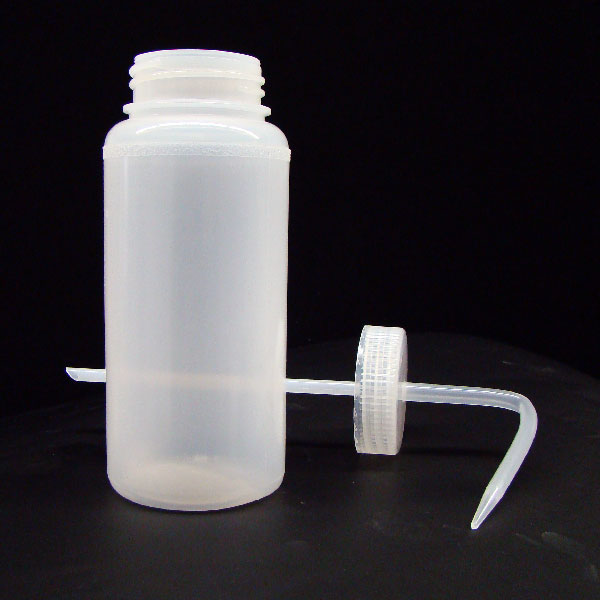
Hide Glue Application Bottle
Now fill up a "Hide Glue Application Bottle" with "Hide Glue". You may want to use a glove or mit if the container is to hot to hold with a bare hand. Now slightly squeeze the bottle of hide glue onto the open areas of frosted glass.
1/8” is the desired thickness of hide glue needed . "Gilder's Asphaltum Varnish" will act as a chemical dam and repels the "Animal Hide Glue" at the line edge as a water based glue won’t mix with the Asphaltum Varnish oil base avoiding ragged edge chip along your lines. If any glue happens to overflow onto the Asphaltum Varnish areas don’t worry, as the hide glue can be easily trimmed off after it gels. If any areas look rough like sand paper after applying hide glue, add a little bit more hide glue over the top of these thinner areas.
For Small areas use Large Hypodermic Needle Tips that slip onto the bottles tip. The smaller Tips allow you to apply "Hide Glue" in small detail areas and in between small lettering. Contact Letterhead Sign Supply for availability.
Large areas may be poured directly onto glass and glue is spread around with a 3 inch Hide Glue Roller to make sure the Hide Glue is applied evenly

or on larger application use the 6 inch Rollar

Remaining "Animal Hide Glue" may be transferred into a can or zip-lock bag and store in a refrigerator until needed again for several months, again keep it stored away and safely from any Children and Animals, and to avoid any ingestion which could cause serious illness and or death.
Drying and clean up:
The "Hide Glue" will need to gel before trimming and glue that has gone over the edges of your lines and may be assisted with the use of a fan in order to gel rapidly. Once glue has reached a jello-like state (gelled), you may cut off any excess hide glue beyond the lines or image using a"" or razor blade.

If any "Gilder's Asphaltum Varnish" is removed when removing excess hide glue you will not have to worry or touch up at this point.
Now wait for the hide glue to harden. Folks in a dry climates will have the "Animal Hide Glue" dry on its own and the chipping process will occur on it’s own. Folks in humid areas over 50% humidity need to assist the hide glue in drying properly by building a glue chipping box made of dry raw wood which assists in drawing out the moisture to assist the chip process. See sample of Glue chipping box (See Diagram at bottom of article).
The best humidity condition for Glass Chipping with "Hide Glue" is at 35% and lower, but ranges from 35%-50% will work fine but will be slower. Local hardware stores often carry humidity gauges in which you can gauge your conditions.
As the chipping process is under way, shards of glass can and will fly up and off so always wear the proper safety glasses to avoid glass from getting into your eyes.
You may assist stubborn areas that have chipped after a majority of the area has chipped by using a sharp X-acto knife to tap at un-chipped areas.
Once Hide glue chipping is completed, you may soak the glass in water to soften and remove any remaining hide glue. Once all of the excess hide glue is removed any remaining "Gilder's Asphaltum Varnish" can be removed with mineral spirits or a similar paint thinner such as naphtha, then was the glass clean with soap and water and then to dry.
Additional Tips:
Chipped Glass looks best when Water Gilded, or left raw, furthermore painted chipped glass tends to not be visible.
Double chipping:
is a method used when creating multiple pieces in which it is necessary to have a consistent chipped patterns. This is done by chipping a second coat of hide glue. The second layer of hide glue will attach itself to any remaining raw sandblasted areas or ferns patterns, leaving more of a nugget like appearance.
Oceania Chipping:
Oceania looks wavy and as if large pieces are ripped out. After the hide glue has gelled but is still damp to touch, place a sheet of heavy bond paper (hand tear the edges of the paper to avoid straight lines) onto the surface. Drying times are a longer, but the layer of placed papers curl up giving the “Oceania” look.
Glue chipping boxes can be made at any size, just make sure it fits your piece. Make sure to use dry unpainted wood.
Drying or Curing Options:
Heats lamps or fans may be used for assisting in the drying process. If using heat lamps, look for temperature
in your box ranging between 90-110 degrees. Make sure to use U.L. listed insulated Metal enclosed Light fixtures to avoid fires.
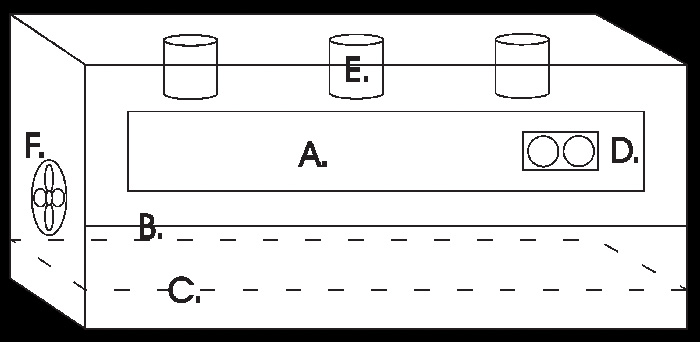
A. Glass window for viewing
B. Hinged (piano) door for access
C. Shelving that’s adjustable
D. Temperature/Humidity Gauge
E. Optional Heat Lamps
F. Optional Fan
All ©Copyrights Reserved by Ron and Kristi Percell 2004-2017 **As the chipping process is under way, shards of glass can and will fly up and off so always wear the proper safety glasses to avoid glass from getting into your eyes. DRIED GLUE IS VERY ATTRACTIVE TO DOGS, KEEP YOUR ANIMALS AWAY FROM HIDE GLUE THAT HAS CHIPPED AND CONTAINS GLASS SHARDS!
Associated words:
- Glass Chipping Hide Glue
- glass chipping hyde glue
- hyde glue
- hide glue
- Glass Chipping
- Glue Chipping
- Glue Chipped
- animal hyde glue
- animal hide glue
- glass chipping glue
- chipped glass hide glue
- hide glue asphaltum
Hide Glue
1 Pound of animal hide glue at 164 gram strength, Animal Hide Glue, Hide glue used in glass chipping.Just add water, 1 1/2 cups water to 1 cup of dry glue.
Stronger mix - 1 cup water to 1 cup of dry glue.
Thinner mix - 2 cups water to 1 cup of dry glue.
Allow Hide Glue and Water to soak in for 30 minutes until swollen, then heat in a glue pot for 30 minutes or until at least 125 degrees, do not heat over 150 degrees.
Hide Glue Glass Chipping
Glass of all types can be chipped with glass chipping hide glue, 1/4" thick annealed plate glass works best. If using a thinner glass such as 1/8", use double strength, its fine for smaller projects. 1/16" window glass (single strength) is to be avoided unless the project is under a square foot. When attempting to chip large areas on thin glass, you run the risk of the panel breaking during the hide glues drying/contracting phase. Hide glue usually chips 50% of the way through the glass on average, so a 1/16" piece after chipping may be only 1/32" thick, which could break easily upon touching by hand. Clean and degrease the working side of your glass panel with Gilders Soap. Commercial glass cleaners and sprays work well and only general cleanliness is required at this point. A U.V. light can be used to determine the uncontaminated side of the glass, if you plan on chemically applying gold (Angel Gilding) or sliver (silvering), but is not necessary if gilding by hand. Folks in a dry climate will have the hide glue dry on its own and the chipping process will occur on its own. Folks in more humid areas over 50% humidity may need to assist the hide glue in drying properly by sealing or storing in a glue chipping box made of dry raw wood. The raw wood assists in drawing out the moisture to assist the chip process. The best humidity condition is at 35% and lower, but ranges from 35%-50% will work fine but will be slower. Local hardware stores often carry humidity gauges in which you can gauge your conditions.
How-to Animal Hide Glue Chip Glass instructions by sign painter Ron Percell.


